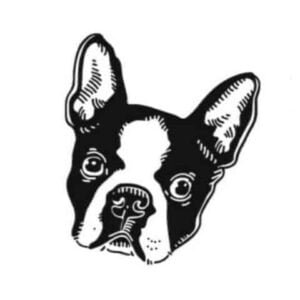
Drawing can be a great way to express your creativity and explore different techniques. Whether you’re an experienced artist or just starting out, drawing a Boston Terrier is a fun project that anyone can do.

Here’s how to draw a realistic-looking Boston Terrier in 8 easy steps. Plus, we have included a number of videos to help you draw your very first Boston Terrier!
Step By Step How To Draw A Boston Terrier
Step 1: Start by sketching out the outline of your Boston Terrier.
This will help you create the basic structure of your drawing. You can use circles, squares, and triangles to create the shape of the body and head. Then, draw two curved lines for the back legs and two straight lines for the front legs.
Step 2: Sketch out the facial features of your Boston Terrier.
You will need to draw two small eyes, two triangle-shaped ears, and a small nose at the end of a curvy line for the muzzle.
Step 3: Now you’ll begin adding details to make your Boston Terrier look more realistic.
Start by adding fur around its body with short strokes until it resembles a fluffy coat of fur. Be sure to add some texture on its face as well by adding short strokes around its eyes, ears, and muzzle.
Step 4: To make your Boston Terrier look even more realistic!
Start adding shadows and highlights to give it dimension. Use light pencil strokes for shadows on its belly or underside while keeping shadows darker under its chin or behind its ears. For highlights on its back and top of head, use slightly heavier pencil strokes than before.
Step 5: Now it’s time to start working on coloring!
You can use colored pencils or markers if you want to add more detail or keep it simple with just one color for shading purposes. Start by coloring the entire body with one color then gradually add shades of other colors such as browns, blacks, tans, etc., depending on which type of Boston Terrier you are trying to draw (there are many varieties!).
Step 6: Add some final touches.
Start adding the final touches, such as whiskers by using light pencil strokes coming from each side of your terrier’s muzzle then erase any unnecessary lines that may have been left over from earlier steps.
Step 7: Time to erase unnecessary marks.
Once you have added all of these details–it’s time to erase any remaining guidelines so that only your finished drawing remains! You may want to go over all areas again with either darker or lighter pencil strokes or markers in order to bring out all areas evenly and give it a polished look once complete!
Step 8: Display it proudly!
Your Boston Terrier drawing is complete! Place it in a frame or hang it up somewhere where everyone can admire it – now you can show off your work!
3 Videos On How To Draw A Boston Terrier
How To Draw A Boston Terrier
How To Draw A Cartoon Boston Terrier
How To Draw A Boston Terrier
Final Thoughts…
Drawing takes practice, but with patience and dedication, anyone can master this skill of drawing a Boston Terrier!
Follow these eight easy steps when learning how to draw a Boston Terrier and soon enough you’ll be able to create amazing pieces that will impress everyone who sees them!
Have fun creating beautiful Boston Terriers – good luck!
